During our fourth lesson of filming we proceeded to continue
editing the very rough version of our sequence that we had created in the previous lesson. We had placed the clips in the desired order on Final Cut and now needed to add appropriate transitions and alter the brightness and contrast in certain aspects, such as the Flashback sections.
 |
| Editing the opening section in the Street |
I edited the opening section up to the first flashback- most of this section was straight cuts from one shot to the other. I proposed having a fade effect on the very first transition from the ambient establishing shot to the long shot of the street but the rest of the group preferred the cut as the transition. This is something we can look at in the rough screening.
Once I had edited up to the first flashback, we added "
Brightness and Contrast" Filters to each of the three sections of the flashback (
Flashback #1 "Asylum"). We decided on having all of the flashbacks at the same brightness (34) and contrast (10) to give them an eerie, supernatural look, to enhance the "dream-state" of the flashbacks. Bethany then added a "
Fade To Colour" transition leading into the flashbacks and out of, so the action will quickly burst to a bright white, then the bright flashbacks, then a burst to white back to the action, all in about one second. This helps to establish a theme of
"light and dark", a convention of the thriller genre.
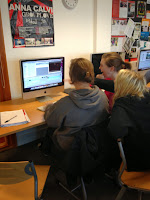 |
| The group reacting to editing success |
Bethany then took over the editing, and we reached the Alleyway section (shot 12 of the Planning Edit). After editing the flashbacks and looking at the rough edit I thought it would be better if we deleted the clip where the Detective turns around after encountering the Shade in the alley and flees (shot #14) as we thought the sequence worked better if the Detective saw the Shade, had the flashback and then the action went straight to the fast-paced forest section. Shown on the left is a picture of the group reacting to this section, we thought it worked quite well. Also, if we need to cut out some areas to shorten the overall length of the clip, shots 12 and 13 here could also be removed to make the same jump from action to flashback to action, but it would be from the Street to the Forest. It also resulted in the temporary removal of two flashbacks, the maps of the street, which could be added back again should we need them.
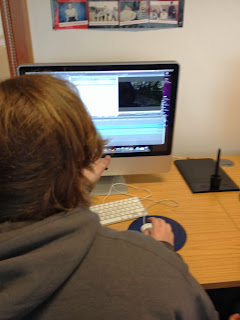 |
| Bethany editing the forest section |
We then needed to edit the forest section by adjusting the Brightness and Contrast again to make the scene feel like it was at dusk. We did this by first reducing the brightness to "-39" in the first areas. Flashbacks also needed to be added where the Detective sees the Shade lurking in the forest (shown on the right), and we needed to fine-tune the action to make the flashback occur whilst the Detective was running but not create a disjointed feel to the sequence. We also needed to precisely time the cut from this shot to the high-angle shot - I proposed this had to be done based on his footsteps and the "skip" as he turns the corner, when one foot was in mid-air, so it looks as if it is the exact same scene filmed from a different angle. Then, as it got darker as we filmed, we needed to reduce the brightness less and less. Ellie did this section of adjusting the brightness whilst the rest of the group approved and disapproved of certain ideas. We then edited the section where the Detective runs up the hill- this scene was quite dark already so we actually brightened it slightly, producing an image similar to that of a CCTV camera - I thought this was good as instead of it being just a standard high-angle shot of the Detective scrambling up the hill, it could be from the
Shades' perspective as they watch him. We then needed to precisely edit the section where the Detective spins, and is surrounded by Shades on all sides. We merged shots 23, 24 and 25 together, as the footage slightly blurs in the exact same position in shot 23 and 25, so it shows the Detective rotating, then falling, then the Shades closing in. We need to take care in adjusting the brightness and contrast here so as to not completely ruin the footage, but enough to enhance the effect of disoreintation and confusion that we intend to create.
Finally, I edited the last few shots of the Detective waking up. Beth suggested we re-ordered the clips so that they flowed more and made more sense, i.e. he wakes up, then opens his hand to reveal the ribbon, then looks around his room before it fades out instead of the other way around. I used a "Fade to Colour" transition on the ending section, but instead of fading to white like Bethany had done in the Flashback transitions it was a fade to black, lasting about a second.
I feel we overcame the issues presented in this lesson, (such as frustration at the software for not adding transitions in the desired direction!) and progressed greatly with our editing. We now need to finish up a few clips and then turn our attention to the titles, which Ellie and I had already briefly looked at and decided our fonts and titling schedule, and then the construction of the Soundtrack.


No comments:
Post a Comment