This is the Rough Cut of the opening sequence to our Thriller, "The Case of Charlotte Adams"
Hey! My name's Joe and this is where I'll post my notes & work related to my media studies over the next year or so.
Views
Wednesday, 22 January 2014
Thriller Opening Sequence - Rough Cut - The Case of Charlotte Adams
This is the Rough Cut of the opening sequence to our Thriller, "The Case of Charlotte Adams"
Thriller Construction - Lesson 6 - Completing the Rough Cut
In today's lesson, we needed to complete the titling, editing and soundtrack that had commenced in the previous lesson so that we could have a rough cut finished for the deadline and could screen the rough cut tomorrow in lesson.
The whole group was present and we really pulled together to finish the last of the titles and fine tune the editing, despite a power cut halfway through the lesson. I continued my work on the Soundtrack on Audacity (which fortunately had saved a auto-recovery back-up of the project after the power cut), be matching the soundtrack to the action. I also implemented editing techniques such as changing the pitches of the two sections of the soundtrack; the first part, the piano segment, is now in a lower key to enhance the dark, mysterious atmosphere we intended to create, matching conventions, and the second section is in a slightly higher key to heighten the suspense created by the faster pace of the sequence. I also added samples of Japanese "Taiko Drummers" at the start of the clip to create anticipation in the audience, and prolonged the areas of silence where the ribbon is picked up and where the Detective exits the forest to create tension. I then exported the Soundtrack, and we placed it into Final Cut where it would play alongside our sequence. Below is a screenshot of the final timeline of the soundtrack, you can see the multiple tracks and samples that were used in the project (the longer pieces were actually mixed into one layer as originally they were several layers!)
We also highlighted which titles were important or essential to have in our opening sequence in note form and jotted down key timings to work together to produce the rough edit. At the end of the lesson we exported the project in Final Cut and uploaded the video to YouTube - it can be seen here or on a separate post on my blog; "Thriller Opening Sequence - Rough Cut - The Case of Charlotte Adams". Next lesson the rough cut will be screened in front of the class and they will fill out audience feedback questionnaires that we also created this lesson, in order for us to make any necessary improvements to our thriller.
 |
| Screenshot of exporting the finished Soundtrack on Audacity |
 |
| A screenshot of the full timeline of the Rough Cut Soundtrack on Audacity |
Monday, 20 January 2014
Thriller Construction - Lesson 5 - Titling and Soundtrack
In today's lesson the focus was to begin the titling process and have a rough soundtrack produced. Bethany was absent, so Ellie and Beth focused on finalising the titles that we had short-listed in the last lesson and selecting the timings and adding the Production Company still that Ellie and I created. LiveType was not functioning properly so they used Final Cut to produce some titles and effects using the fonts myself and Ellie selected when the rest of the group was absent. They did a fantastic job and completed about half of the titles, along with the ending scene where the title is displayed - Ellie produced a very good "typewriter" type effect here that is very effective.
Meanwhile, I was on my own producing a Soundtrack. I had downloaded the editing software Audacity that I referenced in my Soundtrack post and placed all the samples I was going to use into the software, and began fine-tuning and editing each track, by adjusting tempo and abbreviating certain areas, as well as isolating particular notes and segments, such as the piano used in the start - the actual score I was working with was from British rock band Bring Me The Horizon's track "And The Snakes Start To Sing" - I isolated an instrumental by removing the vocal frequency, and then used a loop to get a solemn, piano piece. After discussing with the group, we decided to not use a few other samples I had created, and so extended the loops. Next lesson I need to fine-tune this area by adding a synth effect, that I could find online or use production software to create - the desired effect is a synth that builds in a lurch then cuts, to go at the end of each bar. This will also mean that the backing track will have more layers making it more original. I created a piano effect to go at the end of this sequence using Garage Band, to fade the clip out as the Detective picks up the ribbon in the sequence.
Soundtrack post, to heighten the pace. I listed timings from the edit to base the soundtrack around, so that it was synchronized with the action, i.e. a large crashing noise is heard as the Shade is first seen. In the next lesson, I need to add the Camera sound effects and loud, low-frequency boom on each flashback/Shade sighting, and fine-tune the end section of the Soundtrack also. Although frustrating to time correctly, the lesson was productive and we made good progress as a whole despite the absence of a group member and can hopefully make more progress next lesson towards completing the rough edit.
Tuesday, 14 January 2014
Thriller Construction - Lesson 4 - Editing
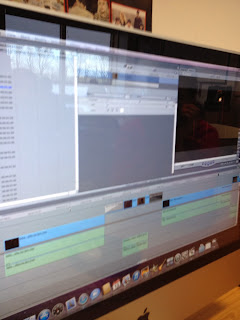
During our fourth lesson of filming we proceeded to continue editing the very rough version of our sequence that we had created in the previous lesson. We had placed the clips in the desired order on Final Cut and now needed to add appropriate transitions and alter the brightness and contrast in certain aspects, such as the Flashback sections.
I edited the opening section up to the first flashback- most of this section was straight cuts from one shot to the other. I proposed having a fade effect on the very first transition from the ambient establishing shot to the long shot of the street but the rest of the group preferred the cut as the transition. This is something we can look at in the rough screening.
Once I had edited up to the first flashback, we added "Brightness and Contrast" Filters to each of the three sections of the flashback (Flashback #1 "Asylum"). We decided on having all of the flashbacks at the same brightness (34) and contrast (10) to give them an eerie, supernatural look, to enhance the "dream-state" of the flashbacks. Bethany then added a "Fade To Colour" transition leading into the flashbacks and out of, so the action will quickly burst to a bright white, then the bright flashbacks, then a burst to white back to the action, all in about one second. This helps to establish a theme of "light and dark", a convention of the thriller genre.
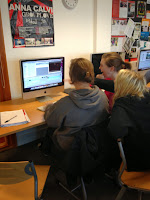
Bethany then took over the editing, and we reached the Alleyway section (shot 12 of the Planning Edit). After editing the flashbacks and looking at the rough edit I thought it would be better if we deleted the clip where the Detective turns around after encountering the Shade in the alley and flees (shot #14) as we thought the sequence worked better if the Detective saw the Shade, had the flashback and then the action went straight to the fast-paced forest section. Shown on the left is a picture of the group reacting to this section, we thought it worked quite well. Also, if we need to cut out some areas to shorten the overall length of the clip, shots 12 and 13 here could also be removed to make the same jump from action to flashback to action, but it would be from the Street to the Forest. It also resulted in the temporary removal of two flashbacks, the maps of the street, which could be added back again should we need them.
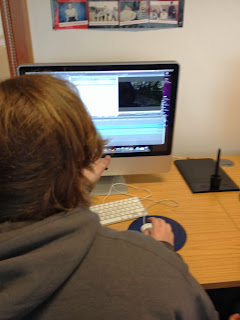
We then needed to edit the forest section by adjusting the Brightness and Contrast again to make the scene feel like it was at dusk. We did this by first reducing the brightness to "-39" in the first areas. Flashbacks also needed to be added where the Detective sees the Shade lurking in the forest (shown on the right), and we needed to fine-tune the action to make the flashback occur whilst the Detective was running but not create a disjointed feel to the sequence. We also needed to precisely time the cut from this shot to the high-angle shot - I proposed this had to be done based on his footsteps and the "skip" as he turns the corner, when one foot was in mid-air, so it looks as if it is the exact same scene filmed from a different angle. Then, as it got darker as we filmed, we needed to reduce the brightness less and less. Ellie did this section of adjusting the brightness whilst the rest of the group approved and disapproved of certain ideas. We then edited the section where the Detective runs up the hill- this scene was quite dark already so we actually brightened it slightly, producing an image similar to that of a CCTV camera - I thought this was good as instead of it being just a standard high-angle shot of the Detective scrambling up the hill, it could be from the Shades' perspective as they watch him. We then needed to precisely edit the section where the Detective spins, and is surrounded by Shades on all sides. We merged shots 23, 24 and 25 together, as the footage slightly blurs in the exact same position in shot 23 and 25, so it shows the Detective rotating, then falling, then the Shades closing in. We need to take care in adjusting the brightness and contrast here so as to not completely ruin the footage, but enough to enhance the effect of disoreintation and confusion that we intend to create.
Finally, I edited the last few shots of the Detective waking up. Beth suggested we re-ordered the clips so that they flowed more and made more sense, i.e. he wakes up, then opens his hand to reveal the ribbon, then looks around his room before it fades out instead of the other way around. I used a "Fade to Colour" transition on the ending section, but instead of fading to white like Bethany had done in the Flashback transitions it was a fade to black, lasting about a second.
I feel we overcame the issues presented in this lesson, (such as frustration at the software for not adding transitions in the desired direction!) and progressed greatly with our editing. We now need to finish up a few clips and then turn our attention to the titles, which Ellie and I had already briefly looked at and decided our fonts and titling schedule, and then the construction of the Soundtrack.
 |
| Editing the opening section in the Street |
Once I had edited up to the first flashback, we added "Brightness and Contrast" Filters to each of the three sections of the flashback (Flashback #1 "Asylum"). We decided on having all of the flashbacks at the same brightness (34) and contrast (10) to give them an eerie, supernatural look, to enhance the "dream-state" of the flashbacks. Bethany then added a "Fade To Colour" transition leading into the flashbacks and out of, so the action will quickly burst to a bright white, then the bright flashbacks, then a burst to white back to the action, all in about one second. This helps to establish a theme of "light and dark", a convention of the thriller genre.
 |
| The group reacting to editing success |
 |
| Bethany editing the forest section |
Finally, I edited the last few shots of the Detective waking up. Beth suggested we re-ordered the clips so that they flowed more and made more sense, i.e. he wakes up, then opens his hand to reveal the ribbon, then looks around his room before it fades out instead of the other way around. I used a "Fade to Colour" transition on the ending section, but instead of fading to white like Bethany had done in the Flashback transitions it was a fade to black, lasting about a second.
I feel we overcame the issues presented in this lesson, (such as frustration at the software for not adding transitions in the desired direction!) and progressed greatly with our editing. We now need to finish up a few clips and then turn our attention to the titles, which Ellie and I had already briefly looked at and decided our fonts and titling schedule, and then the construction of the Soundtrack.
Tuesday, 7 January 2014
NEW: Revised Shooting Schedule
Below is a table showing the revised shooting schedule. Given the change in Planning Edit and decisions made from the first few days of filming, we decided not to do the day-light version of the sequence as it would not be as conventional, i.e. the effect of the street lights and other locations would be lessened. We also thought that the version we had filmed would be suitable as well. We hence re-arranged the last days of filming to film the parts on Marriott's Way and in the forest area around there with slightly more time.
To show this change I have created this table, which shows which shots, with reference to the revised Planning Edit, were to be filmed on which day, with which members of the group and cast were present and any other informtaion regarding that day of filming, to clarify our time management with regards to filming.
To show this change I have created this table, which shows which shots, with reference to the revised Planning Edit, were to be filmed on which day, with which members of the group and cast were present and any other informtaion regarding that day of filming, to clarify our time management with regards to filming.
I have also devised a rough schedule or checklist for tasks we need to complete with regard to constructing the sequence. We needed to have completed a rough edit of the sequence before the Christmas Holidays, which we have done, so we could tackle the other aspects of our sequence. With members of the group being absent beforehand, however, we could not do as planned, so I improvised so we could still stick to our deadlines- we investigated LiveType and fonts to use for the titles as well as the Production company, and experimented with effects and filters in Final Cut to get a better understanding of the software and see how we could edit our clips.
Subscribe to:
Comments (Atom)

